FFmpeg GIF: Ultimate Guide to Creating and Optimizing GIFs with FFmpeg

FFmpeg is a powerful command-line tool for handling multimedia files, and one of its most popular use cases is creating and optimizing GIFs. Whether you’re converting a video clip to a GIF or adjusting animation quality, FFmpeg offers unmatched flexibility. In this guide, we’ll explore how to use FFmpeg for GIF creation, optimization techniques, and best practices to ensure high-quality results. By the end, you’ll master the essential FFmpeg GIF commands and even discover a time-saving tool to automate the process.

Why Use FFmpeg for GIF Creation?

FFmpeg supports numerous codecs and formats, making it ideal for converting video snippets into GIFs. Unlike online converters, FFmpeg gives you precise control over frame rates, resolutions, and color palettes. For instance, you can convert a 5-second MP4 clip to a GIF with this basic command:

ffmpeg -i input.mp4 -ss 00:00:00 -t 5 output.gif

Optimizing GIF Quality and Size

Raw GIFs often suffer from large file sizes. FFmpeg addresses this through palette optimization. Use the following command to reduce size while maintaining clarity:

ffmpeg -i input.mp4 -vf "fps=10,scale=320:-1:flags=lanczos,split[s0][s1];[s0]palettegen[p];[s1][p]paletteuse" output.gif
This command adjusts the frame rate (fps), scales the width to 320 pixels, and generates an optimized color palette.

Advanced Techniques

  1. Trim Precision: Specify exact start/end times with -ss and -t flags.
  2. Frame Rate Control: Lower fps values (e.g., 8-12) balance smoothness and file size.
  3. Loop Control: Add -loop 0 for infinite looping or set a finite loop count.

Common FFmpeg GIF Issues and Fixes

  • Bloated File Size: Always use palette optimization and reduce dimensions.
  • Color Banding: Apply the palettegen filter with stats_mode=full for better gradients.
  • Choppy Playback: Increase fps or check source video stability.

Automate Your Workflow

Manually typing FFmpeg commands can be tedious. Simplify the process using FFmpeg.DVE2.com, a free online tool that generates custom FFmpeg scripts for GIF conversion, resizing, and optimization. Just input your requirements, and it creates ready-to-use commands!

Mastering FFmpeg for GIFs empowers you to create crisp, lightweight animations perfect for social media, tutorials, or web content. Start experimenting today, and don’t forget to supercharge your workflow with automated scripts from FFmpeg.DVE2.com!
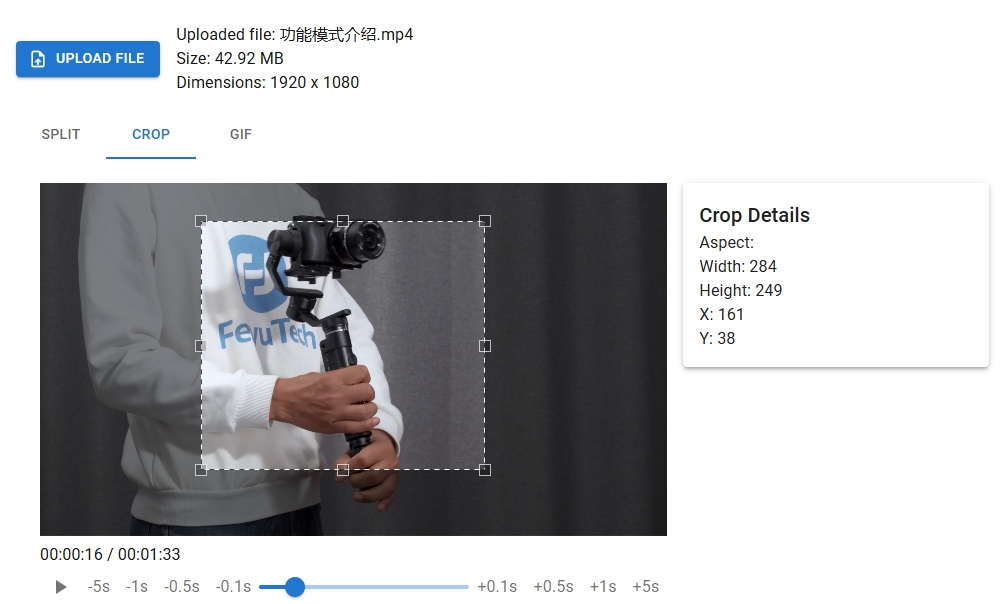
Create GIFs from Video Clips with FFmpeg: Ultimate Conversion Guide

Creating GIFs from video clips is a popular way to share memorable moments, and FFmpeg offers a powerful solution for this task. Whether you’re a content creator, developer, or casual user, learning how to create GIFs from video clips with FFmpeg provides flexibility and control over your output. In this guide, we’ll walk through the entire process, from installation to advanced customization, ensuring your animated GIFs look sharp and load quickly.

Why Use FFmpeg for GIF Creation?

FFmpeg is an open-source command-line tool that supports video, audio, and image processing. Its key advantages include:

  • Precise control over start/end times
  • Custom frame rate adjustments
  • Resolution and color palette optimization
  • Batch processing capabilities

Step 1: Install FFmpeg

First, download FFmpeg for your operating system. Verify installation by running:

ffmpeg -version

Step 2: Basic GIF Conversion

Convert a video segment to GIF with this command:

ffmpeg -ss 00:00:10 -t 5 -i input.mp4 -vf "fps=15,scale=640:-1" output.gif
  • -ss: Start time (10 seconds)
  • -t: Duration (5 seconds)
  • fps=15: 15 frames per second
  • scale=640:-1: Width 640px, auto height

Step 3: Optimize File Size

Generate a custom color palette to reduce file size by 30-50%:

ffmpeg -i input.mp4 -vf "fps=15,scale=640:-1:flags=lanczos,palettegen" palette.png
ffmpeg -ss 00:00:10 -t 5 -i input.mp4 -i palette.png -filter_complex "fps=15,scale=640:-1:flags=lanczos[x];[x][1:v]paletteuse" output.gif

Advanced Customization

  • Reverse GIFs: Add reverse to the filter chain
  • Loop Control: Use -loop 0 for infinite loops
  • Quality Tweaks: Adjust dither and diff_mode in paletteuse

Pro Tips for Better Results

  1. Keep durations under 10 seconds
  2. Use 10-15 FPS for smooth playback
  3. Limit width to 800px maximum
  4. Experiment with different scaling algorithms

For those who prefer a graphical interface or need to create GIFs from video clips with FFmpeg quickly, check out FFmpeg.DVE2.com. This online tool generates optimized FFmpeg scripts automatically based on your requirements, perfect for both beginners and advanced users looking to streamline their workflow.

FFmpeg MP4 to GIF: Convert Videos to Animated Images Easily

Converting video files into animated GIFs is a common need for content creators, especially when sharing clips on social media or embedding tutorials. Among various tools available, FFmpeg stands out as a powerful, open-source solution for transforming MP4 to GIF efficiently. This guide will walk you through the process of using FFmpeg to create high-quality GIFs while optimizing file size and visual clarity.

Why Use FFmpeg for MP4 to GIF Conversion?

FFmpeg is a command-line tool that supports a vast array of video formats and codecs, making it ideal for developers and non-technical users alike. Its flexibility allows precise control over parameters like frame rate, resolution, and color palette, ensuring your GIFs load quickly without sacrificing quality.

Step-by-Step Guide to Convert MP4 to GIF

  1. Install FFmpeg: Download the latest version from the official FFmpeg website and add it to your system’s PATH.
  2. Basic Conversion Command:
    ffmpeg -i input.mp4 output.gif
    This simple command converts the entire MP4 file into a GIF. However, the output might be large and unoptimized.
  3. Reduce Frame Rate: Lowering frames per second (FPS) reduces file size:
    ffmpeg -i input.mp4 -r 10 output.gif
  4. Trim the Video: Specify start time and duration to extract a segment:
    ffmpeg -ss 00:00:02 -i input.mp4 -t 5 -r 12 output.gif
  5. Optimize Color Palette: Generate a custom color palette to enhance visual quality:
    ffmpeg -i input.mp4 -vf 'fps=10,scale=640:-1:flags=lanczos,palettegen' palette.png
    ffmpeg -i input.mp4 -i palette.png -filter_complex 'fps=10,scale=640:-1:flags=lanczos[x];[x][1:v]paletteuse' output.gif

Common Issues and Solutions

  • Large File Size: Reduce FPS, resize dimensions, or shorten clip duration.
  • Poor Quality: Use the palette filter and avoid excessive scaling.
  • Partial Conversion: Ensure correct time format (HH:MM:SS) in commands.

Automate with Online Tools

While FFmpeg offers unmatched control, manually scripting commands can be time-consuming. For a hassle-free experience, try FFmpeg.DVE2.com, an online generator that creates custom FFmpeg scripts for MP4-to-GIF conversion and other tasks. Simply input your requirements, and the tool generates optimized code instantly—perfect for users who prefer a GUI-driven approach.

By mastering FFmpeg, you can create lightweight, engaging GIFs tailored to your needs. Whether for memes, tutorials, or social media, this tool ensures your content stands out.

Convert Video to GIF Command Line: Master FFmpeg for Efficient Conversions

Converting video files to GIFs using command-line tools is an efficient way to create shareable animations for social media, documentation, or presentations. Among the most powerful tools for this task is FFmpeg, a versatile command-line utility that handles multimedia processing with precision. In this guide, you’ll learn how to use FFmpeg to convert video to GIF via the command line, optimize output quality, and automate the process for bulk conversions.

Why Use FFmpeg for Converting Video to GIF?

FFmpeg is a free, open-source tool that supports a wide range of video and image formats. Unlike GUI-based software, it offers granular control over parameters like frame rate, resolution, and cropping. This makes it ideal for developers, content creators, and anyone comfortable with terminal commands.

Step 1: Install FFmpeg

Before running any commands, ensure FFmpeg is installed on your system:
Windows: Download the latest build from FFmpeg’s official site and add it to your PATH.
macOS: Use Homebrew: brew install ffmpeg.
Linux: Install via your package manager (e.g., sudo apt install ffmpeg).

Step 2: Basic Video-to-GIF Conversion

Run this command to convert a video (input.mp4) to a GIF:
bash
ffmpeg -i input.mp4 output.gif

This creates a GIF using default settings, but the output might be large. To optimize it, adjust parameters like frame rate and scale.

Step 3: Optimize GIF Quality and Size

  • Reduce Frame Rate: Limit frames per second (FPS) to lower file size:
    bash
    ffmpeg -i input.mp4 -vf fps=10 output.gif
  • Resize the GIF: Scale the width to 320 pixels while maintaining aspect ratio:
    bash
    ffmpeg -i input.mp4 -vf scale=320:-1 output.gif
  • Trim Video Duration: Extract a segment (e.g., from 00:00:05 to 00:00:10):
    bash
    ffmpeg -ss 00:00:05 -to 00:00:10 -i input.mp4 output.gif

Step 4: Advanced Customization

Use a palette filter to improve color quality and reduce banding:
bash
ffmpeg -i input.mp4 -vf "fps=10,scale=640:-1:flags=lanczos,palettegen" palette.png
ffmpeg -i input.mp4 -i palette.png -filter_complex "fps=10,scale=640:-1:flags=lanczos[x];[x][1:v]paletteuse" output.gif

This two-step process generates a custom color palette for smoother gradients.

Step 5: Batch Convert Videos to GIFs

Automate conversions for multiple files using a shell script:
bash
for file in *.mp4; do
ffmpeg -i "$file" "${file%.mp4}.gif"
done

Common Issues and Fixes

  • Large File Size: Reduce FPS, resize, or limit the color palette.
  • Poor Quality: Use the palette filter and avoid excessive compression.
  • No Output: Check file paths and FFmpeg installation.

Conclusion

Mastering FFmpeg’s command-line interface empowers you to convert videos to GIFs efficiently while maintaining control over output quality. For those who prefer a streamlined approach, try FFmpeg.DVE2.com, an online tool that generates custom FFmpeg scripts automatically. Save time and focus on creating perfect GIFs without memorizing complex commands!

FFmpeg Online Service: Best Tools for Video & Audio Processing in 2024

In today’s fast-paced digital world, leveraging an FFmpeg online service has become essential for creators, developers, and businesses aiming to streamline video and audio processing tasks. FFmpeg, the open-source multimedia framework, powers countless tools for converting, editing, and optimizing media files. However, not everyone has the technical expertise to use FFmpeg’s command-line interface directly. This is where online FFmpeg-based solutions shine, offering user-friendly interfaces and automated workflows. In this article, we’ll explore the best FFmpeg online services, their features, and how they simplify complex multimedia tasks.

Why Use an FFmpeg Online Service?

FFmpeg is renowned for its versatility in handling formats like MP4, MOV, AVI, and FLV, as well as audio codecs such as MP3 and AAC. However, its command-line requirements can be intimidating. Online FFmpeg tools eliminate this barrier by providing pre-configured scripts, drag-and-drop interfaces, and one-click solutions. Whether you need to trim a video, extract audio, compress files, or add subtitles, these services make it effortless.

Top FFmpeg Online Services for 2024

  1. Online Video Converter Pro
    This platform uses FFmpeg under the hood to deliver fast conversions between 300+ formats. Its batch processing feature saves time for large projects, while built-in presets ensure optimal quality for social media platforms like YouTube and Instagram.

  2. CloudFFmpeg
    Ideal for developers, CloudFFmpeg offers API access to integrate FFmpeg functionalities into apps. It supports advanced tasks like video watermarking, frame extraction, and real-time streaming adjustments.

  3. EasyMediaTool
    A beginner-friendly option with templates for common tasks. Upload a file, choose a preset (e.g., “Compress Video for Email”), and download the result—no coding required.

  4. FFmpeg.dve2.com
    For those who prefer customized scripts without installing software, FFmpeg.dve2.com stands out. This free tool generates ready-to-use FFmpeg commands based on your inputs, such as adjusting bitrates, cropping dimensions, or merging clips. Simply input your requirements, copy the script, and run it locally or on a server.

Key Benefits of Online FFmpeg Tools

  • No Installation Needed: Avoid complex setups and dependencies.
  • Cross-Platform Compatibility: Access services from any device with a browser.
  • Cost-Efficiency: Most platforms offer free tiers or pay-as-you-go pricing.
  • Automation: Schedule tasks like encoding nightly backups or processing user-uploaded content.

How to Choose the Right Service

Consider factors like supported formats, processing speed, file size limits, and privacy policies. For advanced users, API availability and script customization (e.g., via FFmpeg.dve2.com) are critical. Beginners should prioritize intuitive interfaces and pre-built templates.

Conclusion

FFmpeg online services democratize advanced media manipulation, making it accessible to everyone. Whether you’re compressing a vacation video or building a video-editing SaaS, these tools save time and reduce technical friction. For developers and power users, combining ready-made platforms with script generators like FFmpeg.dve2.com offers the ultimate flexibility. Visit the site today to create custom FFmpeg scripts in seconds—no command-line expertise required!

Optimize GIF Size with FFmpeg: Reduce File Sizes in 3 Steps

Optimize GIF Size with FFmpeg: A Step-by-Step Guide

GIFs are a popular format for short animations and memes, but their large file sizes can slow down websites and consume bandwidth. Learning how to optimize GIF size with FFmpeg is essential for improving load times and user experience. FFmpeg, a powerful open-source tool, offers advanced methods to compress GIFs without compromising visual quality. In this guide, you’ll discover practical techniques to reduce GIF file sizes efficiently using FFmpeg commands.

Why Optimize GIFs with FFmpeg?

GIF files often suffer from bloated sizes due to uncompressed color data and redundant frames. FFmpeg addresses these issues by enabling palette optimization, frame rate adjustments, and resolution scaling. For example, using a custom color palette reduces the number of colors, which can drastically shrink file sizes. Here’s a basic command to generate an optimized palette:

ffmpeg -i input.gif -vf 'palettegen' palette.png

Step 1: Reduce Colors with Palette Optimization

By default, GIFs use 256 colors, but many animations don’t require that many. Reducing the palette to 64 or 128 colors can save significant space. Use the generated palette to recreate the GIF:

ffmpeg -i input.gif -i palette.png -lavfi 'paletteuse' output.gif

Step 2: Adjust Frame Rate and Resolution

Lowering the frame rate (fps) and scaling down the resolution further reduces size. For instance, reducing a 30fps GIF to 15fps and resizing it to 480px width:

ffmpeg -i input.gif -vf 'fps=15,scale=480:-1' output.gif

Step 3: Remove Redundant Frames

GIFs often include duplicate frames. Use FFmpeg’s trim and setpts filters to eliminate unnecessary segments:

ffmpeg -i input.gif -vf 'trim=start=0:end=5,setpts=PTS-STARTPTS' output.gif

Advanced Optimization: Lossy Compression

FFmpeg allows lossy compression for GIFs, which slightly reduces quality for smaller files. Experiment with the lossy parameter:

ffmpeg -i input.gif -vf 'palettegen=stats_mode=diff' palette.png
ffmpeg -i input.gif -i palette.png -lavfi 'paletteuse=diff_mode=rectangle' -lossy 30 output.gif

Testing and Comparing Results

After optimization, check the file size and visual quality. Tools like GIMP or online validators can help assess compression artifacts. Aim for a balance between size and clarity.

Conclusion

Using FFmpeg to optimize GIF size is a game-changer for web performance. By adjusting palettes, frame rates, and resolutions, you can achieve smaller files without noticeable quality loss. For quick results, try FFmpeg.dve2.com, an online tool that generates custom FFmpeg scripts for GIF optimization and other video tasks. Streamline your workflow today!

FFmpeg Crop GIF: A Step-by-Step Guide to Perfectly Trim Your Animations

FFmpeg is a powerful command-line tool for video and image processing, and one of its most useful features is the ability to crop GIFs with precision. Whether you’re trimming unwanted edges, focusing on a specific section, or resizing animations for social media, learning how to use FFmpeg crop GIF commands can save time and enhance your workflow. In this guide, we’ll walk through the essential steps to crop GIFs using FFmpeg, troubleshoot common issues, and optimize your results.

Why Use FFmpeg to Crop GIFs?

FFmpeg offers unparalleled flexibility for editing GIFs. Unlike basic graphic editors, it allows pixel-perfect cropping, batch processing, and seamless integration with automation workflows. The crop filter in FFmpeg lets you specify exact dimensions (width and height) and starting coordinates (x and y) to isolate the desired portion of your animation.

Step 1: Install FFmpeg

First, ensure FFmpeg is installed on your system. Download it from the official website or use a package manager like brew (macOS) or apt (Linux). Verify the installation by running ffmpeg -version in your terminal.

Step 2: Basic FFmpeg Crop Command

To crop a GIF, use this syntax:
ffmpeg -i input.gif -filter:v \"crop=W:H:X:Y\" output.gif
W: Width of the cropped area
H: Height of the cropped area
X: Horizontal starting position (from the left)
Y: Vertical starting position (from the top)

For example, to crop a 200×200 section starting at the top-left corner:
ffmpeg -i original.gif -filter:v \"crop=200:200:0:0\" cropped.gif

Step 3: Advanced Cropping Techniques

  1. Center-Cropping: Automatically center the crop area using variables:
    ffmpeg -i input.gif -filter:v \"crop=min(iw\,ih):min(iw\,ih)\" output.gif
    This crops the GIF to a square based on the shorter side.

  2. Batch Processing: Use shell scripts to crop multiple GIFs:
    for f in *.gif; do ffmpeg -i \"$f\" -filter:v \"crop=300:300:50:50\" \"cropped_$f\"; done

Optimizing Cropped GIFs

Reduce file size and improve playback with these tips:
– Limit colors: -vf \"crop=W:H:X:Y,split[s0][s1];[s0]palettegen[p];[s1][p]paletteuse\"
– Adjust frame rate: -r 10 to lower FPS.
– Resize output: Add scale=W:H after the crop filter.

Common Issues & Fixes

  • Blurry Output: Ensure input dimensions are divisible by 2 when using certain codecs.
  • Misaligned Crop: Check coordinates using tools like GIMP to preview the crop area.
  • Slow Processing: Pre-convert large GIFs to video formats (e.g., MP4) before cropping.

Conclusion

Mastering FFmpeg’s crop functionality empowers you to create polished, professional GIFs efficiently. For those who prefer a streamlined approach, try FFmpeg.DVE2.com, an online tool that generates custom FFmpeg scripts instantly—no coding required! Perfect for automating GIF edits or learning command syntax through real-time examples.

MP4 to GIF FFmpeg: Complete Conversion Guide with Pro Tips

How to Convert MP4 to GIF Using FFmpeg: A Step-by-Step Guide

Converting an MP4 to GIF using FFmpeg is a powerful way to create shareable, loopable animations from video clips. Whether you’re optimizing content for social media, documentation, or presentations, FFmpeg’s command-line tools provide unmatched flexibility. This guide will walk you through the process of using FFmpeg to transform your videos into high-quality GIFs while maintaining control over file size and visual fidelity.

Why Use FFmpeg for MP4 to GIF Conversion?

FFmpeg remains the gold standard for video processing due to its:

  • Cross-platform compatibility (Windows, macOS, Linux)
  • Precise control over output quality
  • Advanced filtering options
  • Batch processing capabilities

Installing FFmpeg

Before converting MP4 files to GIF:

# Windows: Use Chocolatey (choco install ffmpeg)

macOS: Install via Homebrew (brew install ffmpeg)

Linux: sudo apt-get install ffmpeg

Basic Conversion Command

ffmpeg -i input.mp4 output.gif

Optimizing GIF Quality and Size

Enhance your results with these parameters:

ffmpeg -i input.mp4 \
-vf "fps=10,scale=640:-1:flags=lanczos" \
-output.gif

Key Parameters Explained:

  • fps: Controls frame rate (15-24 for smooth motion)
  • scale: Reduces file size while maintaining aspect ratio
  • palettegen: Improves color accuracy

Advanced Palette Optimization

For professional-grade results:

ffmpeg -i input.mp4 -vf \
"fps=15,scale=800:-1:flags=lanczos,palettegen" \
palette.png

ffmpeg -i input.mp4 -i palette.png -filter_complex \
"fps=15,scale=800:-1:flags=lanczos[x];[x][1:v]paletteuse" \
output.gif

Common Use Cases

  • Social media reactions
  • Software demonstrations
  • Educational content
  • Website animations

Troubleshooting Tips

  • Reduce fps for smaller file sizes
  • Limit color palette to 256 colors
  • Use precise time trimming (-ss and -t parameters)

For those who prefer automated solutions, try the FFmpeg Script Generator at ffmpeg.dve2.com. This online tool creates optimized conversion scripts based on your specific requirements, eliminating manual command-line work while ensuring professional results.

FFmpeg Online: Web-Based Tools and Script Generators for Media Processing

FFmpeg is a powerful open-source tool for handling multimedia files, but setting up commands can be daunting for beginners. This is where FFmpeg online solutions shine, offering user-friendly interfaces and pre-built scripts to simplify video and audio processing. Whether you’re converting formats, trimming clips, or adding filters, web-based FFmpeg tools eliminate the need for complex installations while maintaining the software’s renowned flexibility.

Why Use FFmpeg Online Tools?

Online FFmpeg platforms bridge the gap between advanced functionality and accessibility. They allow users to:

  • Execute commands without terminal expertise
  • Generate scripts through intuitive forms
  • Process files directly in browsers
  • Access pre-configured templates for common tasks

Top FFmpeg Online Solutions

While several web-based FFmpeg services exist, FFmpeg.DVE2.com stands out with its AI-powered script generator. Simply describe your media task (e.g., “convert MP4 to WebM with 720p resolution”), and the platform automatically creates optimized commands. Other notable features include:

  • One-click copy-paste functionality
  • Error-checking before execution
  • Batch processing capabilities
  • Cross-platform compatibility guides

Practical Use Cases

Here’s how businesses and creators leverage online FFmpeg tools:

  1. Social Media Teams: Quickly resize videos for Instagram, TikTok, and YouTube
  2. Podcasters: Merge audio tracks and normalize volume levels
  3. Educators: Compress lecture recordings without quality loss

Security Considerations

Reputable FFmpeg online services like FFmpeg.DVE2.com process files client-side, ensuring your media never leaves your device. Always verify a platform’s privacy policy before uploading sensitive content.

As streaming and remote work continue growing, web-based FFmpeg tools will become essential for efficient media workflows. For both novices and experts, FFmpeg.DVE2.com offers a perfect blend of simplicity and power—try their free script generator today to streamline your next project.

Online FFmpeg: Transform Your Media Processing Workflow in 2024

What Is Online FFmpeg and Why Do You Need It?

In today’s digital landscape, online FFmpeg tools have become indispensable for video and audio processing. FFmpeg, the open-source multimedia framework, powers countless applications for converting, editing, and streaming media files. With the rise of cloud-based solutions, online FFmpeg platforms now allow users to execute complex commands without installing software. This article explores how these tools simplify workflows and why they are essential for creators, developers, and businesses.

Key Features of Online FFmpeg Tools

  • Format Conversion: Convert videos between MP4, MOV, AVI, and more.
  • Codec Adjustment: Optimize file sizes without compromising quality.
  • Batch Processing: Handle multiple files simultaneously.
  • Cross-Platform Compatibility: Access tools from any device with a browser.

Top Use Cases for Online FFmpeg Solutions

Whether you’re a content creator or a developer, online FFmpeg services streamline tasks like:

  1. Preparing social media clips with platform-specific resolutions
  2. Extracting audio tracks from video files
  3. Adding subtitles or watermarks to media
  4. Generating thumbnails for video content

How to Choose the Right Online FFmpeg Platform

When selecting an online FFmpeg tool, prioritize platforms that offer:

  • Intuitive user interfaces
  • Real-time preview capabilities
  • Secure file handling
  • Customizable presets

Boost Productivity with Advanced FFmpeg Scripts

For advanced users, online FFmpeg script generators automate repetitive tasks. These tools create optimized commands for:

  • Video compression pipelines
  • Audio normalization workflows
  • Metadata editing processes

Looking to simplify FFmpeg command creation? Try the online FFmpeg script generator at ffmpeg.dve2.com. This platform offers pre-built templates and smart suggestions, making media processing accessible to users of all skill levels.